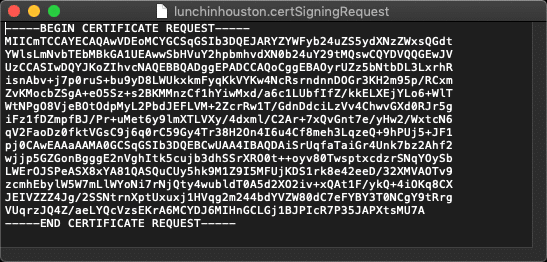
Generate a Certificate Signing Request (CSR) in macOS Keychain Access
How to generate a certificate signing request (CSR) and key pair in macOS Keychain Access to order digital certificates from SSL.com.
- SSL Support Team
- August 10, 2020
- CSR Creation, macOS
Related Content
How to Change your Thales SafeNet/Gemalto Token Password
August 28, 2024
Enabling Third-Party Signing Certificates with eSigner Cloud Signing
August 7, 2024
Send a Secure Email using a S/MIME Certificate in the new Outlook for Mac
August 7, 2024
S/MIME Certificate Management with Microsoft Azure Active Directory and inTune using SSL.com Azure Integration Tool
July 23, 2024
Generate a Certificate Signing Request in Azure Key Vault
June 18, 2024
Want to keep learning?
Subscribe to SSL.com’s newsletter, stay informed and secure.
Copy article link
How to Generate a CSR in macOS Keychain Access
For more helpful how-tos and the latest cybersecurity news, subscribe to SSL.com’s newsletter here:
Time needed: 15 minutes To order your certificate from SSL.com, you need to generate a Certificate Signing Request (CSR). To generate a CSR in macOS Keychain Access you’ll need to:
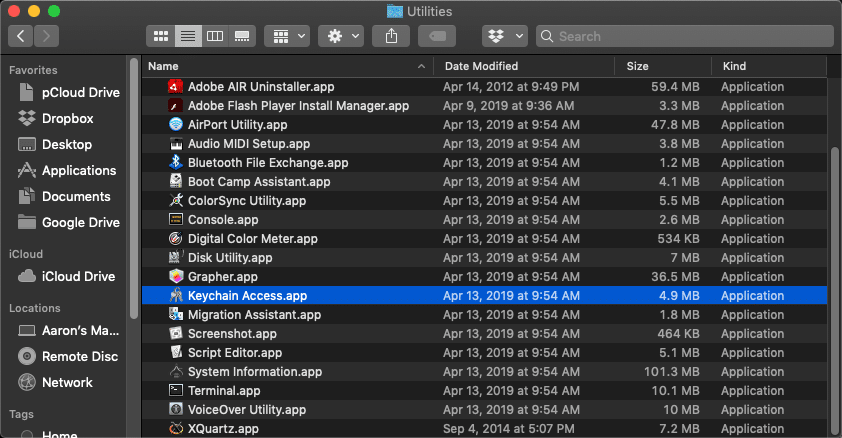
- Open Keychain Access. Open the Keychain Access application, located at /Applications/Utilities/Keychain Access.app.
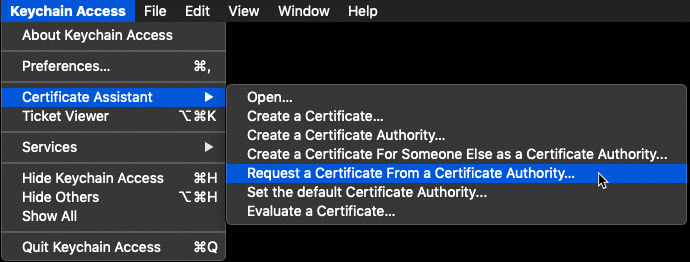
- Open Certificate Assistant. Select Keychain Access >> Certificate Assistant >> Request a Certificate From a Certificate Authority… from the menu.
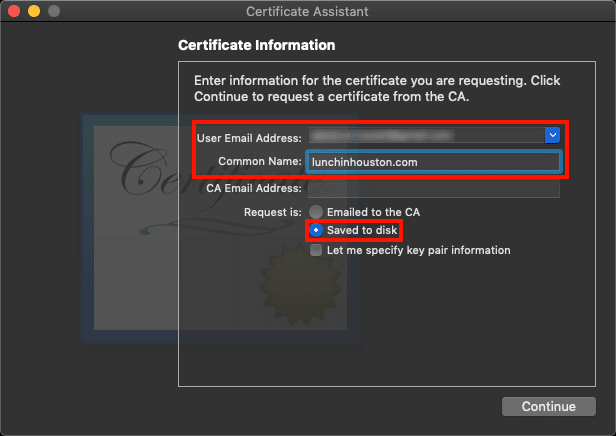
- Enter email address and common name. In the Certificate Assistant window that opens, enter your email address in the User Email Address field. Then, enter the Fully Qualified Domain Name (FQDN) of the website this certificate will protect in the Common Name field (depending on the certificate type, this may be a wildcard, such as *.example.com ). Leave the CA Email Address field blank. Check the Saved to disk radio button.
- Choose to specify key size and algorithm (optional). If you want to change the default key size and algorithm for the key pair (optional), check the Let me specify key pair information checkbox.

- Continue. Click the Continue button.
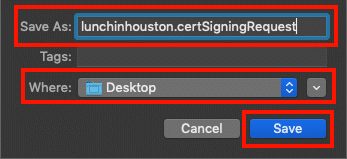
- Save CSR. In the dialog box that appears, give the CSR a filename with the extension .certSigningRequest , choose a location to save it, and click the Save button.
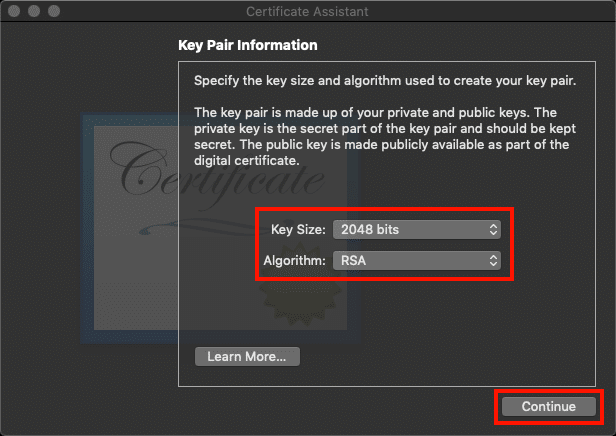
- Select key size and algorithm (optional). If you checked the optional Let me specify key pair information checkbox in step 4 above, you will be prompted to choose the Key Size and Algorithm from the drop-down menus. After setting them, click Continue. If you did not check the box this prompt will not appear.
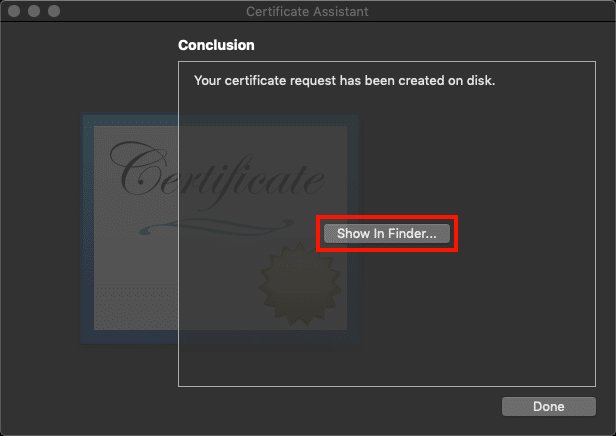
- Show in Finder. Your new CSR will be saved to disk in the location you specified. Clicking the Show In Finder… button will open a Finder window with the CSR file.
- Close Certificate Assistant. Click the Done button to close the Certificate Assistant window.

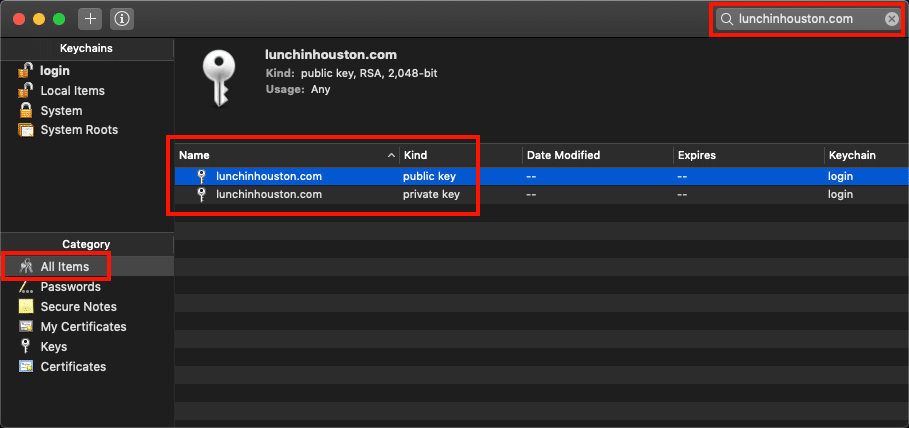
- Confirm key pair generation and installation. You can confirm that your new key pair has been generated and installed in your system by clicking All Items in the left-hand Category menu of the main Keychain Access window and typing the Common Name for the new CSR in the search box at the upper right.
- Open CSR in a text editor. Open the new CSR file in a text editor to copy and paste it when ordering certificates from SSL.com. See our how-to on Ordering and Retrieving SSL/TLS Certificates for instructions on using your new CSR in certificate orders. For information on installing your certificate, please see our how-to, SSL/TLS Installation on macOS 10.14 Mojave.
